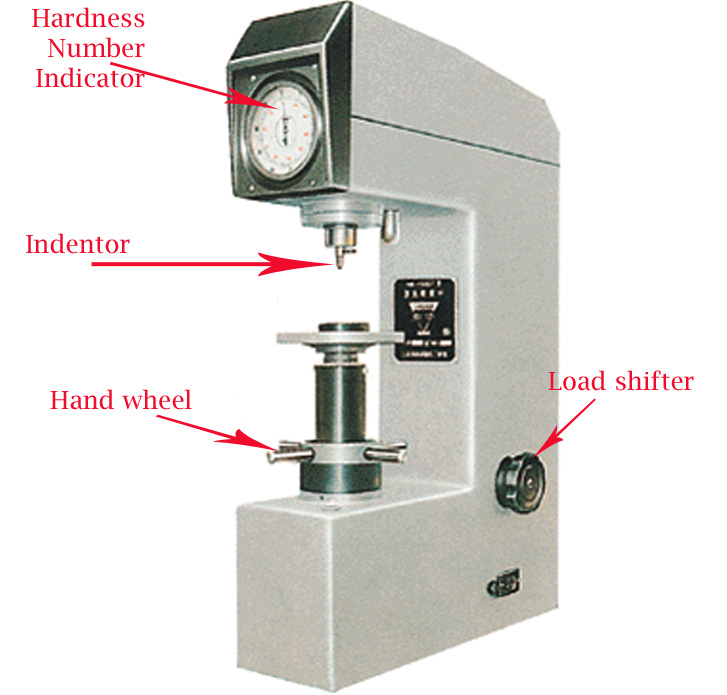
EXPERIMENT
OBJECTIVE:
To determine the hardness of the given specimen using Brinell hardness test.
APPARATUS REQUIRED:
- Brinell hardness testing machine.
- Aluminum specimen.
- Ball indenter.
THEORY:

The hardness of a material is its resistance to penetration under a localized pressure or resistance to abrasion. Hardness tests provide an accurate, rapid and economical way of determining the resistance of materials to deformation. There are three general types of test is conducted:
(i) Scratch hardness measurement.
(ii) Rebound hardness measurement
(iii) Indentation hardness measurement
In scratch hardness method the materials are rated on their ability to scratch one another and it is usually used by mineralogists only.
In rebound hardness measurement, a standard body is usually dropped on to the material surface and the hardness is measured in terms of height of its rebound.
The general means of judging the hardness is measuring the resistance of a material to indentation. The indenter is usually a ball, cone or pyramid of a material much harder than that being used. Hardened steel sintered tungsten carbide or diamond indenters are generally used. In indentation tests a load is applied by pressing the indenter at right angles to the surface being tested. The hardness of the material depends on the resistance which it exerts during a small amount of yielding or plastic straining. The resistance depends on friction, elasticity, viscosity and the intensity and distribution of plastic strain produced by a given tool during indentation.
BRINELL HARDNESS TEST:
Brinell hardness consists in forcing a steel ball of diameter D under a load P into the test piece and measuring the mean diameter d of the indentation left in the surface after removal of the load. The Brinell hardness is obtained by dividing the test load P by curved surface area of the indentation. This curved surface is assumed to be portion of the sphere of diameter D.
Brinell Hardness Number, BHN = [frac up=”2P” down=”π . D ( D – √D2 – d2)”]
TEST REQUIREMENTS:
- BALL: Usual ball size is 10 mm ± 0.0045 mm. It shall be hardened and tempered steel with a hardness of at least 850 VPN (Vickers’s pyramid number). It shall be polished and free from surface defects.
For soft metal, load = 5000 N
For hard metal, load = 3000 N
The load shall be applied for a standard time, usually 30 seconds.
- TEST PIECE: Smooth and free from oxide film. Thickness of the piece to be tested shall not be less than 8 times the depth of indentation.
- Diameter of indentation will be measured in two direction normal to each other with an accuracy of ± 0.025 % of diameter of ball under microscope provided with cross-tables and calibrated measuring screws.
- BHN may then be determined from tables.
PROCEDURE:
- Insert ball of diameter ‘D’ in the ball holder of machine.
- Make the specimen surface clean by oil, grease, dust etc.
- Make contact between the specimen surface and ball using jack adjusting wheel.
- Push the required button for loading.
- Pull the load release level and wait for 15 seconds.
- Remove the specimen from the support table and locate the Indentation.
- View the indentation through microscope and measure the diameter ‘d’ of the indentation using micrometer fixed on the microscope.
- Repeat the procedure and take three readings.
OBSERVATIONS:
- Diameter of the ball, D =
- Test load =
- Load application time =
OBSERVATION TABLE:
|
S. No. |
Ball Diameter (D) ‘mm’ |
Load Applied (P) ‘kgf’ |
Diameter of Indentation (d) |
BHN = [frac up=”Load Applied (kgf)” down=”Spherical surface area of indentation”]
Brinell Hardness Number, BHN = [frac up=”2P” down=”π . D ( D – √D2 – d2)”]
PRECAUTIONS:
- Brinell test should be performed on smooth, flat specimens from which dirt scale have been cleaned.
- The test should note be made on specimens so thin that the impression shows through the metal, nor should impressions be made too close to the edge of a specimen.
- Note down the readings carefully.
RELATED VIDEOS:
