FITTING SHOP
MEASURING AND MARKING TOOLS
-
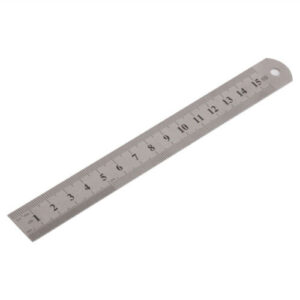
ENGINEER’S STEEL RULE:
It is a stiff, straight steel strip having all the faces machined true. On one of the flat faces, graduations are marked in inches and centimeters.
-
CALIPERS:
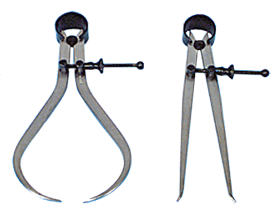
These are used with the help of steel rule to check outside and inside measurements. They are specified by the maximum length measured. Sizes vary from 100 mm to 300 mm.
There are two types of caliper: (a) Outside Calipers (b) Inside Caliper
Outside Calipers are used to are used to measure the outside diameter of round objects and to measure width and thickness.
Inside Calipers are used to set internal dimensions, to transfer them to work or to check with standards.
-
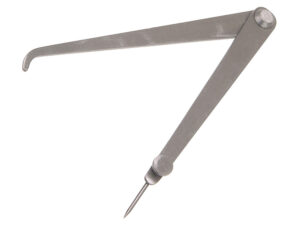
HERMAPHRODITE, JENNY or ODD LEG CALIPER:
It is made up of steel tapered strip which is hinged between washers at one end. One leg is bent at the tip inwardly and the other has a straight pointed end. It is used to find the centre of a round bar by holding a bent leg against a curved face of the bar and the pointed leg on the end face. It is also used to scribe parallel lines to the straight edges or for taking distance from the edges of the holes or plates and similar jobs.
-
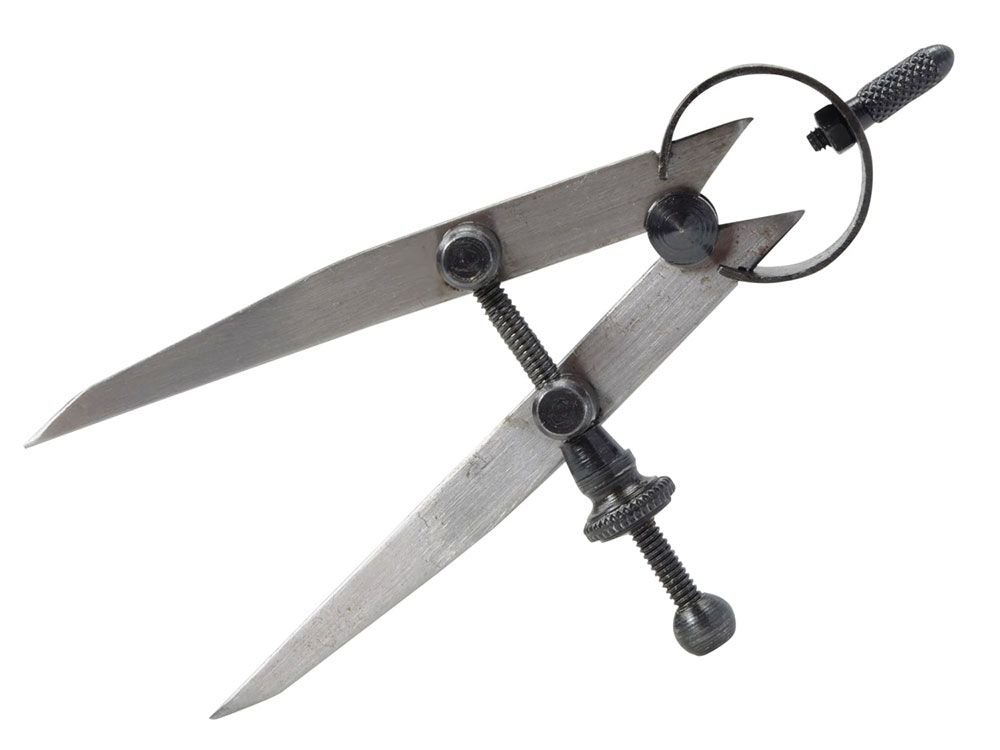
DIVIDER:
A divider is an important instrument used for marking work. It is similar to calipers but its legs have sharp points. The dividers are used for measuring the distance between two points, dividing a given length in a definite ratio, drawing circles and arc and transferring dimensions from scales to objects.
-
SURFACE PLATE:
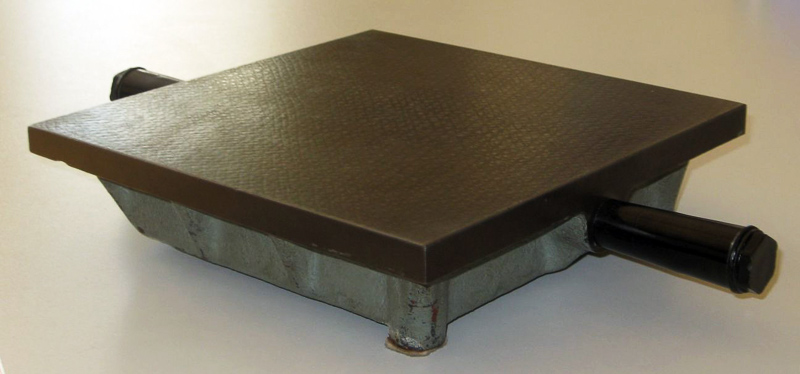
It is made of grey cast iron in various sizes. It is usually square or rectangular and has top and the adjacent four edges very accurately machined and scraped to form a true flat surface and brought in square. It is placed horizontally on a firm support whose working height is about 800 mm from the floor. It is used to check the trueness of flat surfaces and to copy the master surface on a work.
-
SCRIBER:
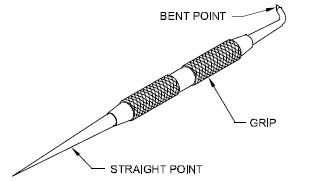
It is a round hardened steel piece of about 150 mm to 300 mm long and 3 mm to 5 mm in diameter. Its one end is sharp pointed and the other end is also sharp pointed but bent. The bent end is used to scratch lines in places where the straight end can not reach.
-
PUNCHES:
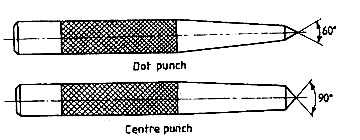
A punch is a marking tool used in bench work and is known as centre punch. It is generally made from 10 mm octagonal cast steel about 100 mm long. One end of the punch carries a point ground to an included angle of 90° and is tempered to a pale straw color while the other end is slightly chamfered to prevent it from burring. The body is knurled for gripping it by hand. It is used for marking the ends of work to be centered for turning in lathe as well as for all centers of holes for drilling.
The PRICK or DOT PUNCH is similar to centre punch but small in size. It is made from 6 mm diameter cat steel with a sharper point of 60°. It is sued for marking position of lines and centers of circles to be drawn with the dividers.
-
V BLOCK:
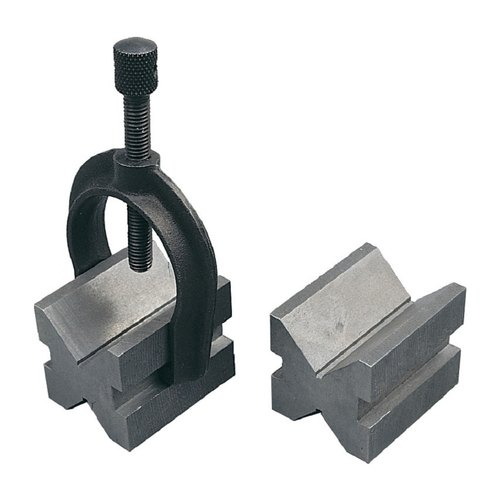
The V block is made of cast iron and all the faces are machined true. The two opposite side faces have V grooves and the two have slots. The round bars are held firmly by a u clamp engaging in slots. The V blocks are used for holding round bars during marking and center drilling their end faces which are to be held between centers on lathe. It is also used for holding round bars while they are drilled at right angles to their axis.
-
ANGLE PLATE:
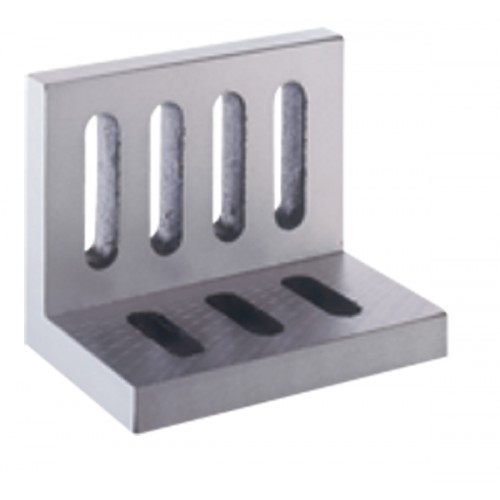
The angle plate is made up of cast iron in different sizes. It has two planed surfaces at right angles to each other and has various slots in both the surfaces to hold the work firmly by means of bolts and clamps. The angle plate is used with the conjunction of surface plate for supporting work at right angles for marking.
-
VERNIER CALIPERS:
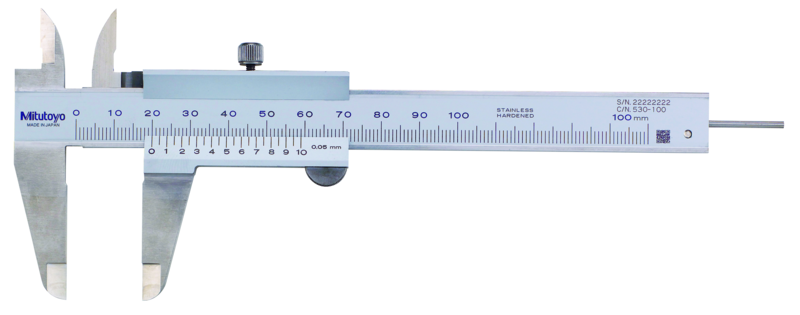
These are used for measuring outside as well as inside dimensions accurately. It may also be used as a depth gauge. In the figure shown, 19 main scale divisions are divided into 20 equal parts in the Vernier scale. Hence, least count of the Vernier = 1 main scale division – 1 Vernier scale division = 1 – 19/20 = 0.05 mm. The size is specified by the maximum measurement it can make ranging from 150 to 300 mm. The accuracy of the instrument depends on the least count, varying from 0.1 to 0.02. Other types of Vernier’s include dial Vernier, digital Vernier with more accuracy etc.
-
VERNIER HEIGHT GAUGE:
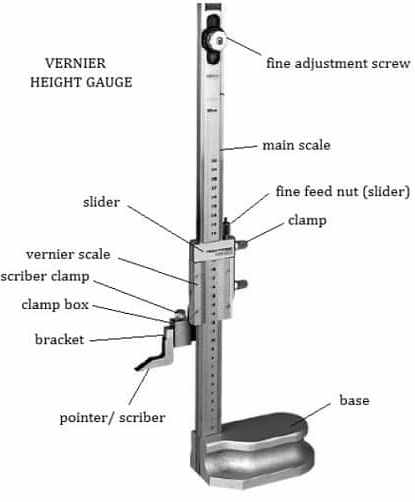
The Vernier height gauge, clamped with a scriber, is shown in figure. It is used for layout work. An offset scriber is used when it is required to take measurements from the surface, on which the gauge is standing. The accuracy and working principle of the gauge are the same as those of the Vernier caliper. The capacity of the height gauge is specified by the maximum height it can measure. It varies from 150 mm to 1000 mm. Uphold human values. Give respect and take respect. Moral values are more valuable than material wealth.
-
OUTSIDE MICROMETER:
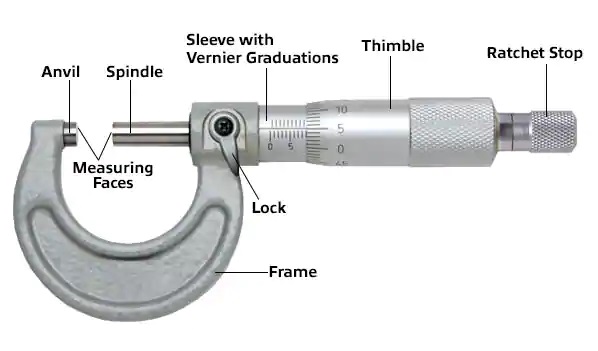
This is used for measuring external dimensions accurately. Figure shows a micrometer of 0 to 25 mm range with an accuracy of 0.01 mm. These are available in different ranges with interchangeable anvils varying from 0-25 mm to 2000 mm in sizes and 0.01 to 0.001 in accuracy. There are many types of micrometers designed for special purpose use. They include thread micrometers to measure thread dimensions, tube micrometers to measure wall thickness of tubes, etc.
-
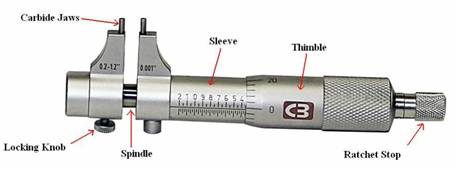
INSIDE MICROMETER:
This is used to measure inside dimensions accurately. Figure shows an inside micrometer. These are available in different ranges and accuracies.
-
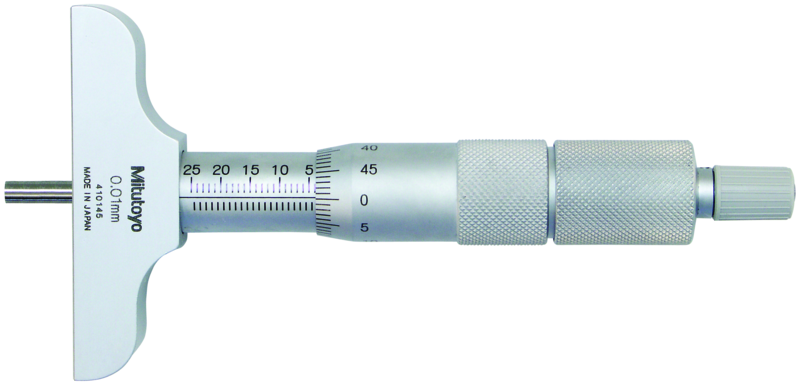
DEPTH MICROMETER:
It is designed to measure the depth of holes, slots, recesses etc. The working principle of this is similar to the outside micrometer. Its base is hardened ground and lapped to reduce wear. These are available up to a range of 300 mm and accuracy of 0.01 mm. In this the reading is taken from the thimble end (right to left), unlike the outside micrometer where reading is taken from left to right.
-
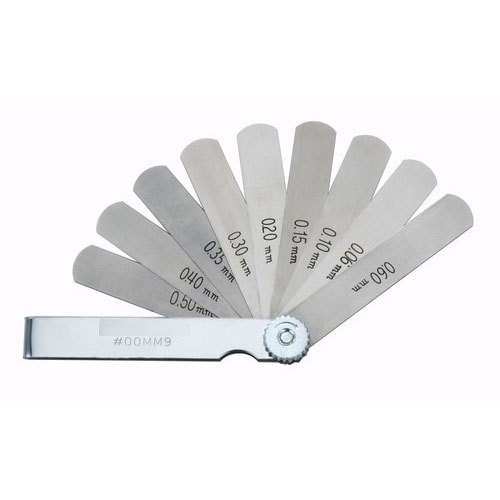
FEELER GAUGES:
The thickness gauges or feeler gauges are a set of gauges consisting of thin strips of metal of varying thickness. They are widely used for measuring and checking bearing-clearance, adjusting tappets, spark plug gaps, and so on. The thickness varies from 0.05 to 0.5 mm.
-
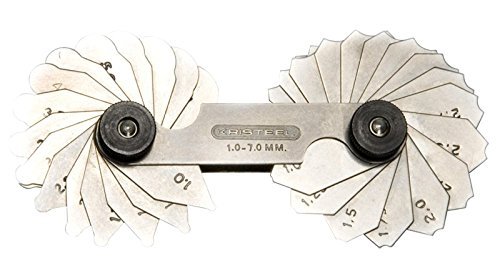
RADIUS GAUGES:
Also known as fillet gauges, these are of thin flat steel tool used for inspecting and checking or laying out work having a given radius. Such a gauge is made in sets of individual gauges for measuring concave (internal) or convex (external) radius.
-
SCREW PITCH GAUGES:
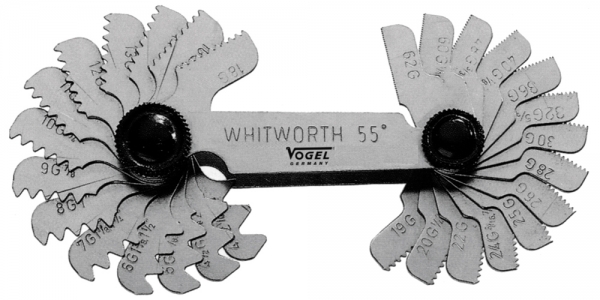
A screw pitch gauge is used for quickly determining the pitch of a threaded part or tapped hole. The gauge consists of a set of templates of teeth, each confirming to a standard pitch.
-
DRILL GAUGES:
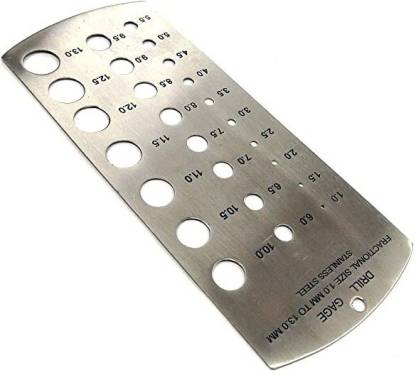
Thin sheets with holes drilled accurately to the size marked are used as drill gauges for easy selection and checking of drill size. This is very much useful when the drill size marked on the drill wears out over repeated usage. These gauges are also available as stands for letter drills and number drills which are very small in size.
-
TRY SQUARE:
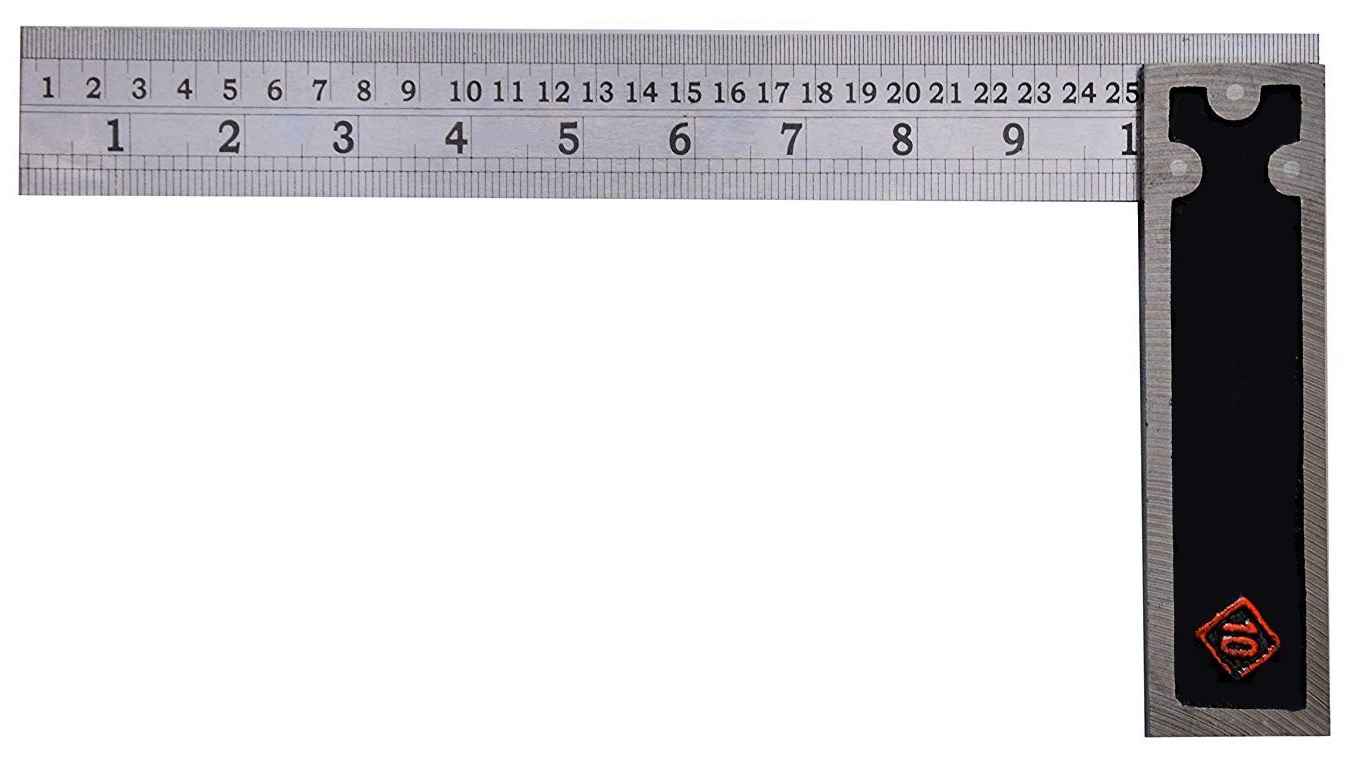
Try square is used for making and testing angles of 90 degree. It consists of a steel blade, riveted into a hard wood stock which has a protective brass plate on the working surface. Another type is the all-metal square, 2 with steel blade and cast iron stock. Sizes vary from 150 to 300mm, according to the length of the blade.
METHOD OF MARKING:
The marking on a work is the most important operation in the bench work, in order to obtain an accurately finished product. It consists of setting out the dimensions on a work from the working drawing or transferring them from a similar part. The following procedure is adopted for marking on a work:
- The surface of the work is coated with a paste of chalk and allowed to dry.
- If the work is flat, it is laid with its uncoated surface on the face of the surface plate and if it is round, it is held in V block and clamped. In case the work s too thin, it is normally supported against an angle plate keeping the surface to be marked at right angles to the surface of surface plate.
- Then horizontal lines are first scribed by means of scribing block or surface gauge. The vertical lines are drawn by turning the work through 90° and by using the scriber. If a true surface is available on the edge of the work to be marked, then the horizontal and vertical lines may be marked with the help of a try square.
- The center on the end of a round bar may be located by using a hermaphrodite caliper and surface gauge or a combination set.
- The circles and arcs on a flat surface are marked by means of a divider.
- After the scribing work is over, light indentations are made along the scribed lines, centers of circles and arcs, by means of a dot punch and a hammer. These punch marks serve as a guide for further operations like filing, chipping, drilling etc. During these operations the metal us removed up to half the circumference of these punch marks to ensure that the job has gone undersize.
RELATED VIDEOS FOR MEASURING AND MARKING TOOLS:
For More Information- CLICK HERE
